Creating a new partition on a disk in Ubuntu 24.04. Working with fdisk.
04 Mar 2025, 23:14:36
Let's go into detail about creating a new disk partition in Ubuntu 24.04, in our case, but the instructions will work for most Linux systems.This article will be useful if you have added a new disk to your server or computer, increased disk space on your VPS and want to mount it to a certain directory.
In this instruction we will work with the utilities: fdisk and mkfs. They are available by default in Ubuntu 24.04 and many other distributions. fdisk is a console utility that allows us to manage disk partitions on our device. mkfs creates a file system on these partitions.
In our example, we will create a new partition on the VPS disk space and mount it to the /mnt/tmp_data directory. The situation when you add a new disk to a dedicated server or computer and want to mount it to a specified directory is similar to this one. All commands in this example are run as the root user.
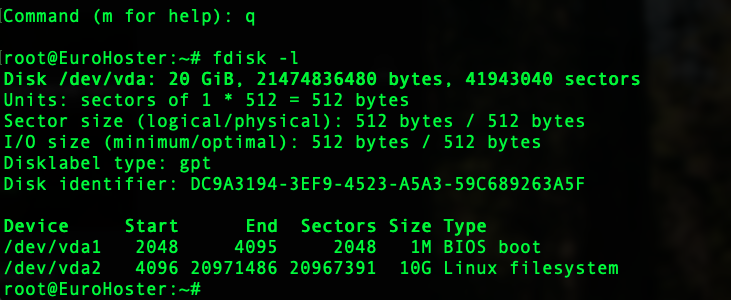
Let's start by looking at the list of available disks and their partitions on the server, as well as information about them using a simple command:
fdisk -lYou'll see a similar output: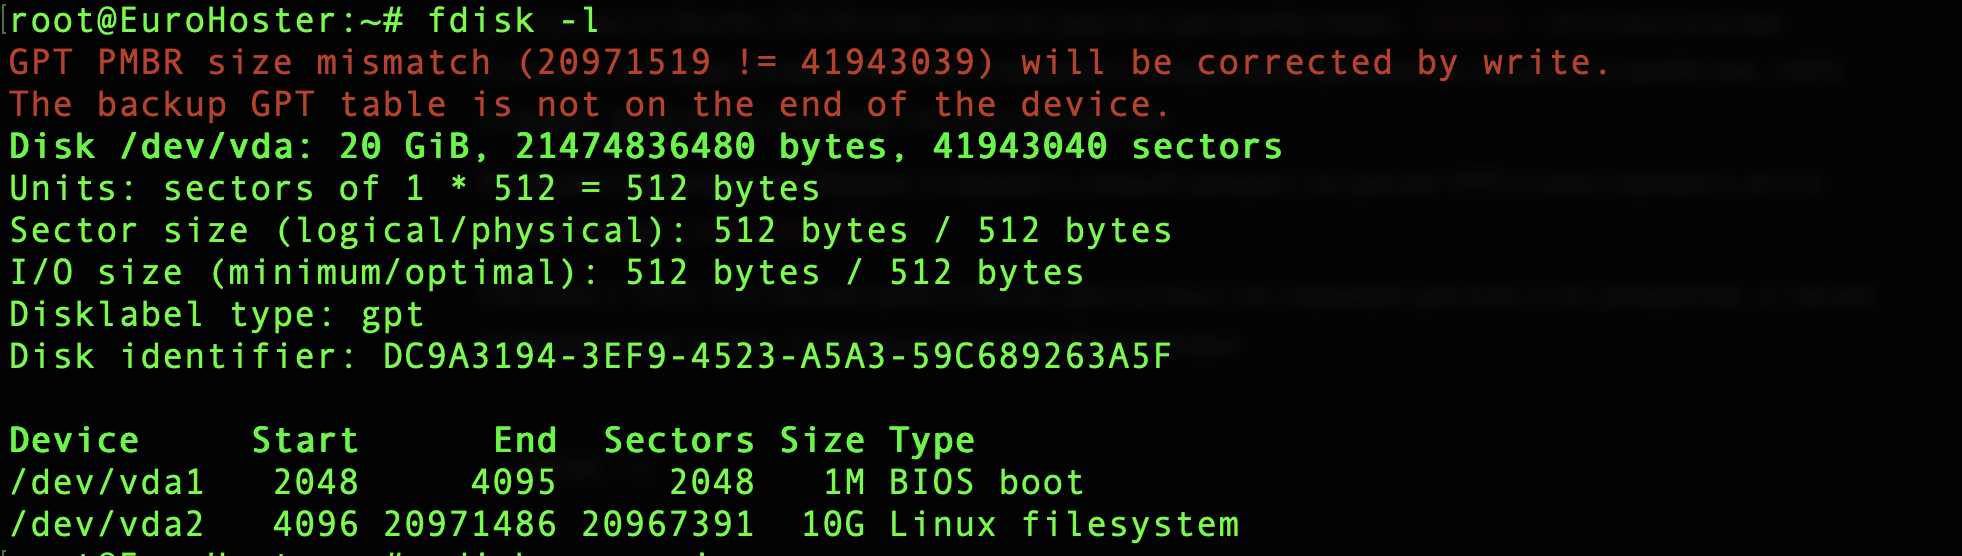
In the screenshot above, the disk /dev/vda is 20 GB in size and has two partitions: /dev/vda1, /dev/vda2. Half of the space (10 GB) is already occupied by the second disk partition. Our task is to create a new partition that will occupy the remaining 10 GB.
In case you have added a new disk to the system, it is quite normal that there will be no partitions on it, further instructions are also relevant for you.
Creating a partition with fdisk
Let's run fdisk with the name of our media as a parameter. In the example it is /dev/vda, it may be different for you:fdisk /dev/vdaIf you have specified an existing disk on the system, the command mode of the fdisk utility will run successfully: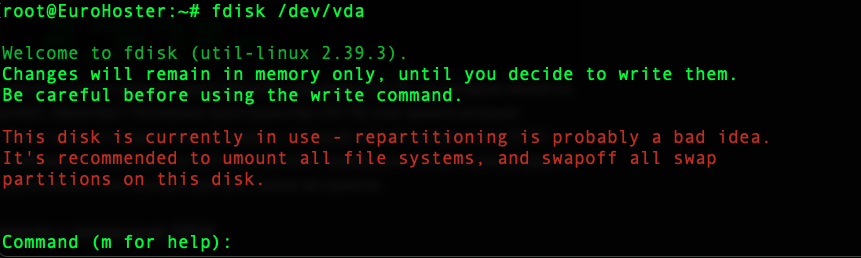
As the program itself tells us, with the 'm' command we can open a list of all commands with their descriptions:

We will only need a few of them. Namely:
- n - adds a new partition;
- l - displays a list of all partition types;
- t - changes the partition type;
- p - displays the disk partition table;
- w - saves the changes to the partition table and exits;
- q - exits the program without saving the changes.
Let's start creating a new partition. To do this, enter the 'n' command and get the partition number input line:

Pressing Enter selects the default value, in our case 3.
It is important to note that fdisk can work with both GPT and MBR partition structures. If your case uses MBR, after entering the 'n' command, you will be asked to select the partition type: p - primary or e - extended (according to fdisk itself, a container for logical partitions.). Normally, you can select p and then you will also have a partition number entry line:

After selecting the partition number, we will be prompted to specify its first sector, to which we also respond with the default value by pressing Enter:

The new line gives us the choice of specifying the last sector, the number of sectors from the sector specified in the last step, or the size of the new volume - this is useful if you only want to use a portion of the available disk space for the new partition. In the example shown, we need to use all the remaining space, so we press Enter again, selecting the default value:

And we get a message about successful creation of a new partition number 3, in our case with the type Linux filesystem and size 10 GB:

In just a couple of clicks we have created a new partition on our disk and we can already save the changes in the partition table, but let's look at a few useful commands of the fdisk utility.
Changing partition type with fdisk
Let's enter the 'l' command and see a list of all partition types and their numbers: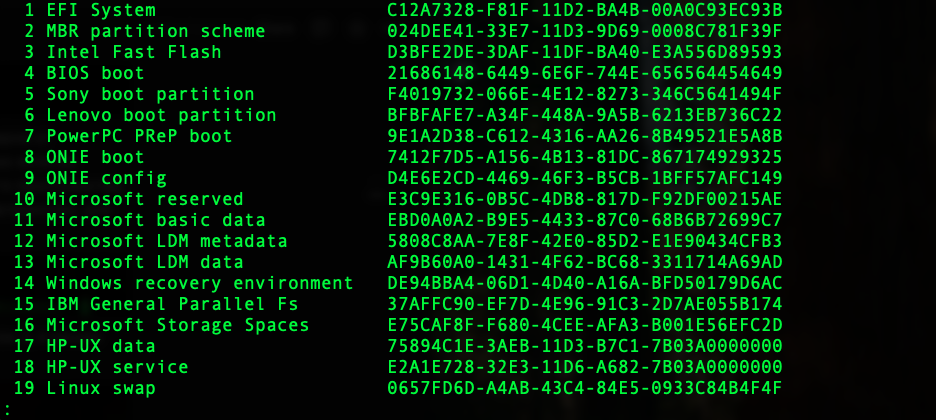
The list is quite large. To scroll through it press Enter, to close click the button Q on the keyboard. It will also be different for MBR and GPT structures. The picture shows the result for GPT. For example, the default type of Linux filesystem in the case of MBR would be 83, in the case of GPT it would be 20.
To change the partition type, enter the 't' command and in the new line the program will prompt us to enter the number of the partition whose type we want to change:

Press Enter again and on a new line we get the number of the partition type, the list of which we looked at earlier, as well as a hint that this list can be displayed again by entering the L command:

In the example, the number 21 was entered and the partition type was successfully changed to Linux server data:

As you may have realized, you don't have to change the partition type at all.
Let's take a look at our new partition table. To do this, enter the 'p' command:
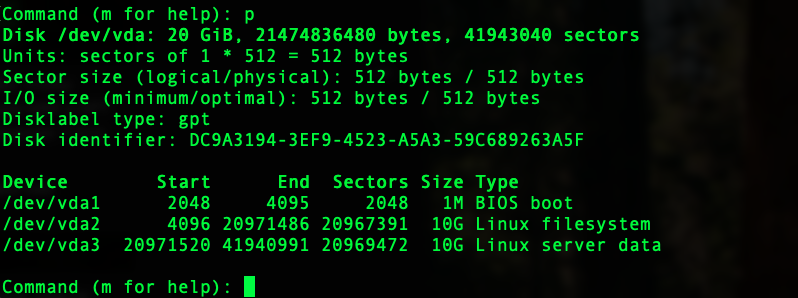
As you can see, there is a new partition /dev/vda3 on the disk, which, as planned, occupies 10 GB and is of type Linux server data. But in fact, until we save these changes to the partition table, no new partition actually exists. Right now we can type 'q' and exit fdisk, the partition table will still be intact, all our changes will just be lost:
Saving changes to fdisk
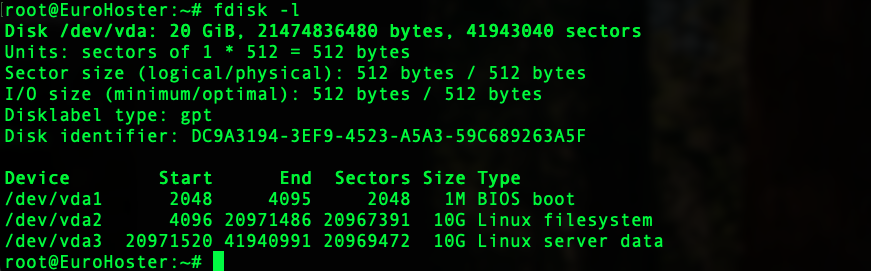
All the changes we made earlier exist only in fdisk memory for now. To write them to our disk, enter the 'w' command:
And we can see that the partition table has been successfully changed. The new partition, /dev/vda3, now exists on the disk and we can work with it:
Formatting a partition in Linux
The last step before mounting a partition into a directory is to create a file system on the partition. For this we will use the mkfs utility (mke2fs), which also has various arguments for specifying formatting parameters. But in most cases, specifying the file system and partition will be enough:mkfs.ext4 /dev/vda3In the example, we have successfully created an ext4 file system on the /dev/vda3 partition: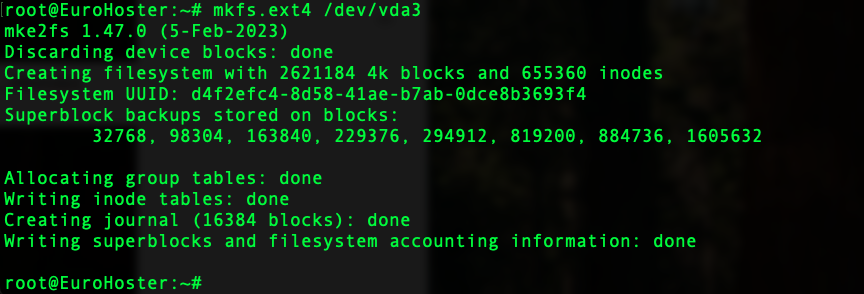
Mounting a partition in Linux
Now we have everything we need to mount the new partition to the desired directory. First of all, let's create this directory, in the example it is /mnt/tmp_data, using the mkdir utility:mkdir /mnt/tmp_dataNext, we can manually mount the /dev/vda3 partition to the /mnt/tmp_data directory with the mount command:mount /dev/vda3 /mnt/tmp_dataHowever, this will only work until the next reboot of the system. To save the new mount point information permanently, we need to add it to the /etc/fstab file. To do this, we need to know the UUID of the partition. We can see it in the output of the mkfs command we ran earlier, in the Filesystem UUID line:
Or use the blkid utility and find the line with our partition. For convenience, let's add a bit more to the command (instead of /dev/vda3 the name of your partition):
blkid | grep "/dev/vda3"We are interested in the contents of the UUID parameter, in the example it is d4f2efc4-8d58-41ae-b7ab-0dce8b3693f4:
Now we have everything we need to add an entry to the /etc/fstab file. To do this, let's open it:
nano /etc/fstabAt the end of the file, add a line of the form:UUID=d4f2efc4-8d58-41ae-b7ab-0dce8b3693f4 /mnt/tmp_data ext4 defaults 0 2In it "UUID=d4f2efc4-8d58..." is the UUID of our partition, followed by the mount directory /mnt/tmp_data, file system ext4, mount options defaults, 0 - disables backup, 2 - performs file system check at startup after root partition check.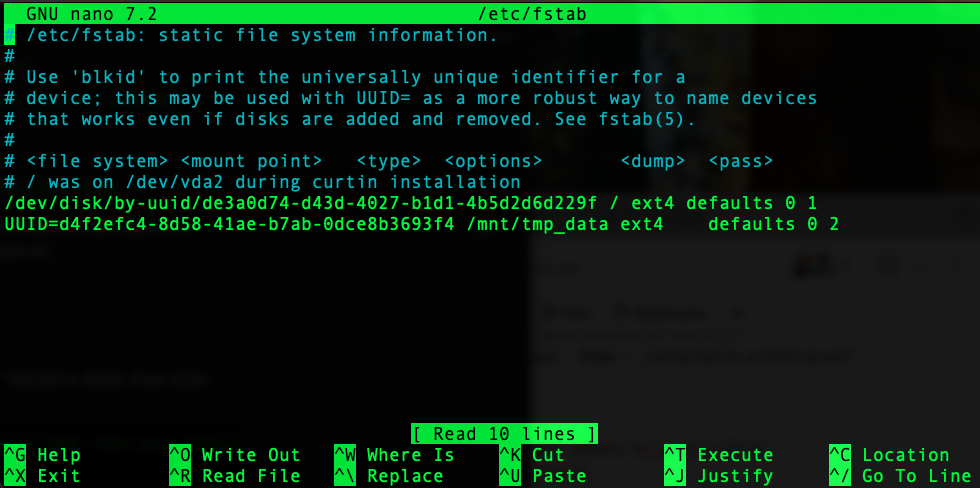
Save the file with Ctrl + O and apply the changes we made with the mount command:
mount -aIf everything was added correctly, the command will output nothing:
We can verify that our partition has been mounted to a given directory by directly starting work with it or using the df utility:
df -hAs a result, we can see our partition, free space information and the directory to which it is mounted in the list: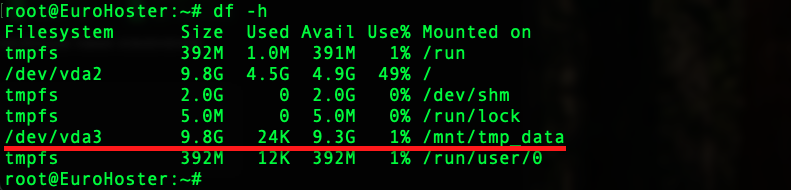
In this uncomplicated way, step by step we created a new partition on the disk using fdisk, formatted it and mounted it to the specified directory.