How to Install Apache Web Server on Ubuntu 24.04
28 Dec 2025, 17:33:19
The Apache web server is one of the most popular and reliable web servers in the world, used to host and manage websites. Developed in 1995, it has since become the foundation for numerous websites thanks to its flexibility and powerful features. Apache supports a variety of operating systems, including Windows, Linux, and macOS, making it a versatile choice for developers and administrators. One of Apache's key advantages is its modular architecture, which allows you to add or remove functionality depending on your project's needs. For example, you can install modules for PHP processing, security management, or website acceleration. Apache also offers a high degree of customization, allowing you to optimize the performance and security of web applications. Moreover, it supports multiple protocols, including HTTP/2, which helps improve page loading speed. Thanks to an active developer community, Apache is constantly updated and improved, making it a reliable choice for both small and large projects.Preparing the System Before Installing Apache
Before installing Apache, it's important to prepare your system to ensure stable and secure operation of your web server. First, ensure your operating system is updated to the latest version. This will help avoid library conflicts and security vulnerabilities. Next, check for necessary packages, such as libc, gcc, and other dependencies that may be required to install Apache. Use your OS's package manager (such as apt for Debian/Ubuntu or yum for CentOS) to install these components. It's also recommended to create a separate user for Apache, which improves security by isolating the web server from other processes on the system. Don't forget to configure your firewall by opening ports 80 and 443 for HTTP and HTTPS, respectively. This will allow your server to accept incoming requests from clients. Once these steps are complete, you can proceed to installing and configuring Apache, which will ensure the reliable operation of your web application. By following these recommendations, you'll prepare your system to work effectively with Apache, minimizing potential problems.Installing Apache Using APT
This is a simple and effective way to deploy a web server on Debian-based systems like Ubuntu. First, you need to update the package list by running the following command:apt updateThis will ensure that the latest version of Apache is installed.It is also recommended to update the versions of installed software on the server using the command:
apt upgradeThen, to install the server, enter the command:apt install apache2Once the installation is complete, Apache will start automatically.You can view the version currently running on your system using the command:
apache2 -vTo check the service status, use:systemctl status apache2You should see the status active (running).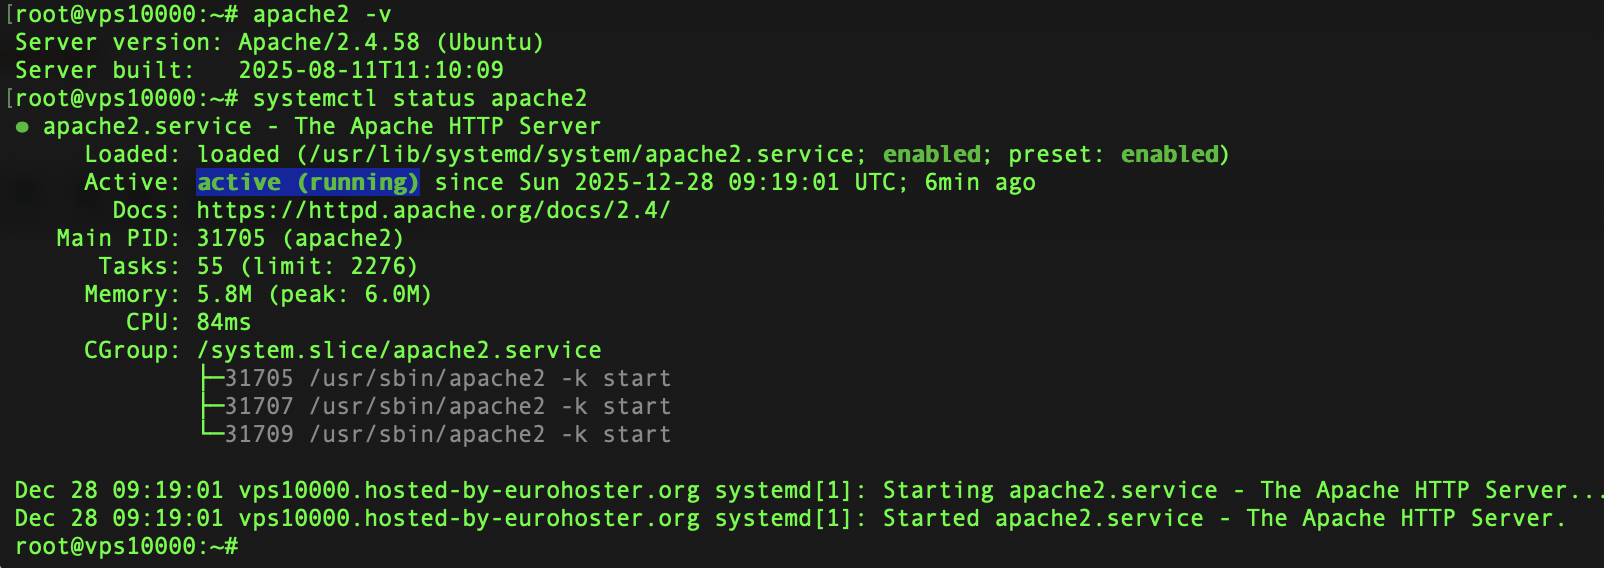
MPM (Multi-Processing Module) Configuration for Apache
Apache supports several MPM (Multi-Processing Modules), including prefork, worker, and event, each with its own features and purposes. The deprecated Worker MPM is not worth describing due to its inability to work in a multi-processing solution and its lack of sufficient security.Description MPM Prefork Apache
When using the Prefork module, Apache operates as a non-multithreaded web server by pre-spawning child processes. This means that each Apache child process contains a single thread and processes one request at a time.Therefore, it consumes slightly more resources than the multi-threaded Event MPM, but also provides better stability. The Prefork MPM uses a parent process to keep several additional or idle processes open to handle new requests.
Pre-forking child processes remains the best choice if Apache must use non-thread-safe libraries, such as mod_php (DSO), and is ideal if process isolation is important. Finding the right balance between the maximum number of processes and the available RAM on the server is crucial when pre-forking child processes, as it consumes a lot of RAM. Pre-forking child processes should always be used when performing something that is not thread-safe.
Most versions of PHP are still not thread-safe, and the only MPM module that is safe to use with non-thread-safe code is the Prefork MPM, as it creates new processes, rather than threads, to handle new requests.
Description MPM Event Apache
The Event MPM was introduced in Apache 2.4. It's quite similar to the older Worker MPM, but is designed to handle high loads.Each process within Event MPM can contain multiple threads, but unlike Prefork, each thread is capable of performing more than one task.
This mode is only supported on servers running Apache 2.4. It allows you to process more requests simultaneously by offloading some of the processing work to auxiliary threads.
When using Event MPM mode, Apache attempts to solve the "keep-connection" problem that other MPM modes encounter.
Once the client completes the first request, it can keep the connection open and send subsequent requests using the same socket, reducing connection overhead. However, this can also lead to processes hanging for long periods of time in situations where the code is not written optimally.
If Apache processes remain active for too long, this can lead to exhaustion of server resources and, as a result, the server stops working.
Apache MPM Management
To determine which MPM is used on your system, run the following command:apache2ctl -M | grep mpmExpected response:mpm_event_module (shared)
To switch to thread-safe prefork, run the following commands:
a2dismod mpm_event

a2enmod mpm_prefork

systemctl restart apache2

apache2ctl -M | grep mpm
Configuring a Firewall for Apache
Before testing Apache, it's a good idea to configure your firewall to allow web traffic. Using UFW (Uncomplicated Firewall), allow access to Apache and other necessary services, such as SSH, and block access to everything else.After installing Apache, several application profiles are automatically registered with UFW, which determine which ports to open for different types of traffic. To view these profiles, run the command:
ufw app list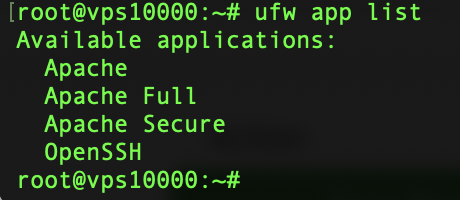
Each profile provides different levels of access:
| Profile | Open ports | Description |
| Apache | 80/tcp | Allows unencrypted HTTP traffic |
| Apache Secure | 443/tcp | Allows encrypted HTTPS traffic |
| Apache Full | 80, 443/tcp | Allows both HTTP and HTTPS traffic |
ufw allow 'OpenSSH'Since most modern websites use HTTPS by default, it's best to enable the Apache Full profile to allow both HTTP and HTTPS connections:
ufw allow 'Apache Full'To enable UFW on your system, run the following command:
ufw enableYou'll see a result something like this:Firewall is active and enabled on system startup
You can check the status using the command:
ufw statusAnd the extended output:ufw status verbose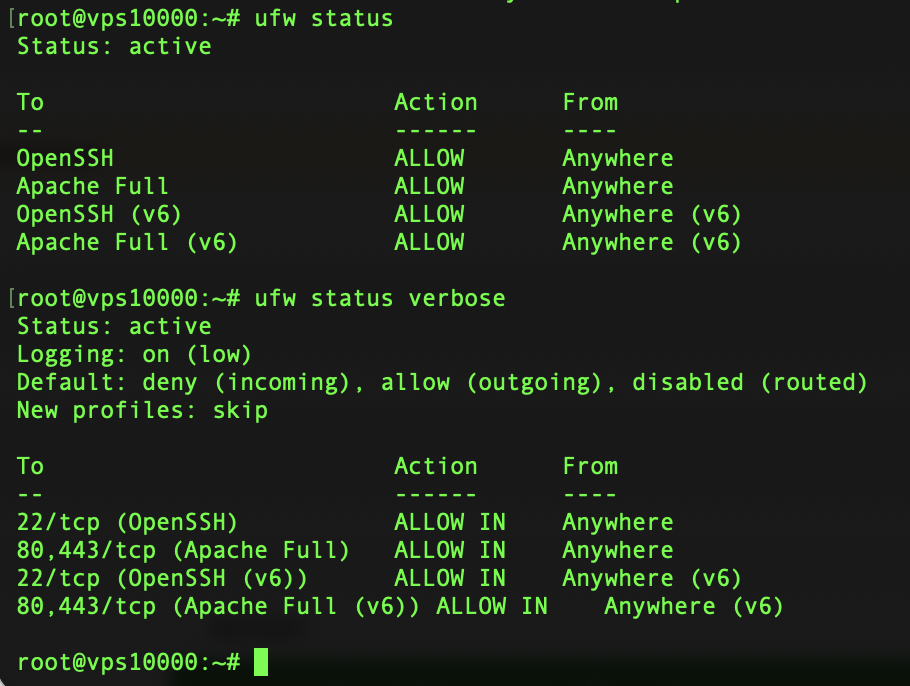
Checking the Apache Service Status
After installation, Apache starts automatically. Let's check if it works.In Ubuntu, Apache is managed by systemd, which controls the starting, stopping, and restarting of services. To check if Apache is running, run the following command:
systemctl status apache2As a result, you should see something like this: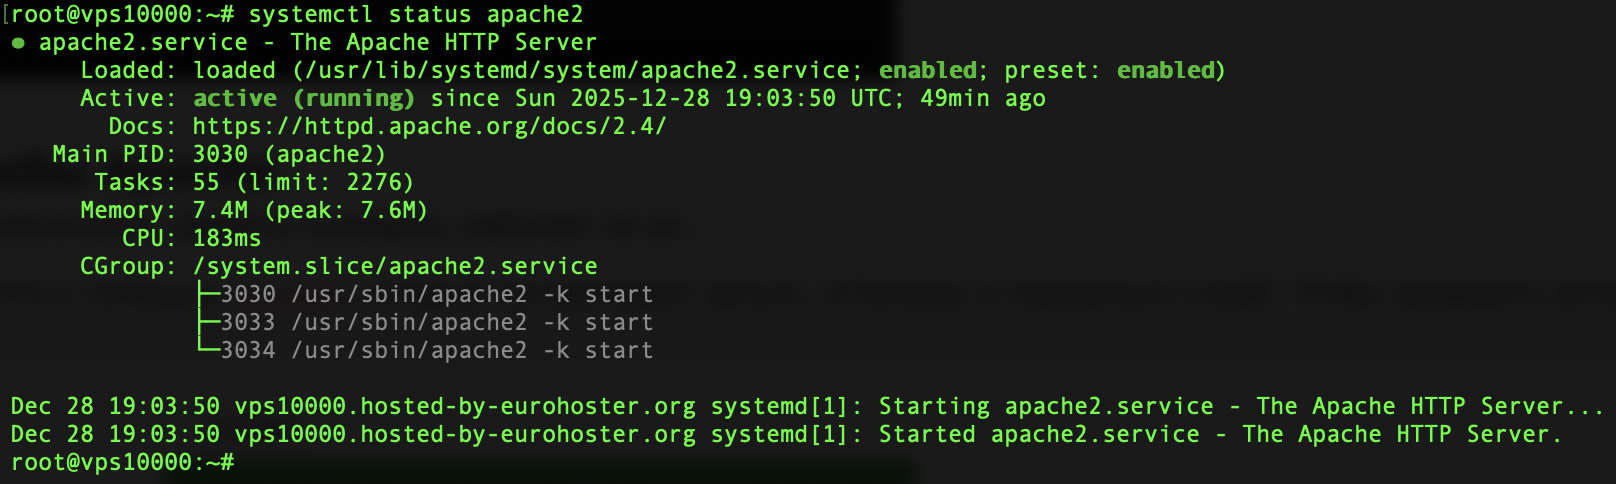
If you see Active: active (running), then Apache is up and running.
If Apache is not active, you can start it manually using the command:
systemctl start apache2Enable or Disable Apache at System Boot
By default, Apache is configured to start automatically at system boot. You can confirm this by checking its enabled status:systemctl is-enabled apache2To disable Apache from starting automatically at system boot:
systemctl disable apache2To turn it back on:systemctl enable apache2To simply confirm that Apache is running, without full log output, you can use:
systemctl is-active apache2If the status is active, Apache is working as expected.