How to protect a website directory with a password using .htpasswd file in Nginx
04 Jun 2025, 19:58:53
The Nginx web server does not use .htaccess like Apache, but it still supports basic HTTP authentication using .htpasswd files. This is a simple way to restrict access to sections of your website with a login and password.What is .htpasswd?
.htpasswd is a text file that stores user names and their encrypted passwords. This file is used to implement basic HTTP authentication: when a user attempts to open a protected page, the browser requests a login and password. If the entered data does not match the entries in .htpasswd access will be denied.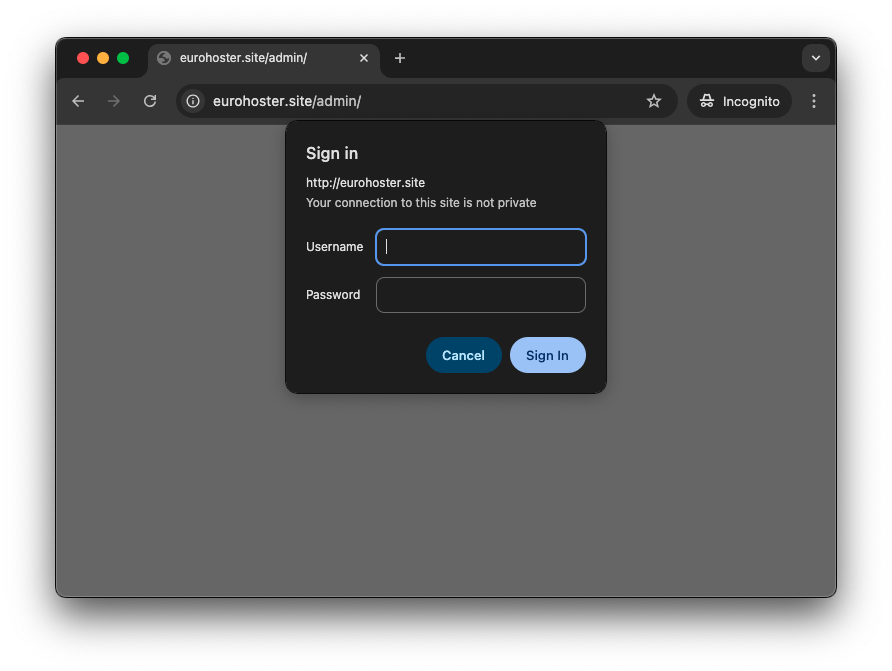
Creating .htpasswd file
The easiest way to create an .htpasswd file is to use the htpasswd utility, which is part of the Apache-utils or httpd-tools package.htpasswd -c /etc/nginx/.htpasswd admin- -c - create a new file. Do not use this flag if users have already been added to the file, otherwise they will be overwritten.;
- /etc/nginx/.htpasswd - path to the .htpasswd file. We have placed it in the Nginx configuration directory for convenience;
- admin - the name of the user being added.

The file contents are very simple:
user_name:MD5-hash_password
This means that there is no need to install packages with the htpasswd utility if Apache software is not used on the server.
We can generate this file ourselves, even online.
Creating .htpasswd file without Apache utilities
We can use the openssl utility to create an .htpasswd file. This is a convenient method, especially if you don't use Apache and only work with Nginx. OpenSSL must also be installed on your server if you have Nginx installed. To be precise, we will create the file manually using the command:echo "admin:" > /etc/nginx/.htpasswd- admin - username;
- /etc/nginx/.htpasswd - path to the .htpasswd file.

We generate a password hash using openssl:
openssl passwd -apr1Enter and confirm the password - the result is a ready-made hash.
Next, we manually copy the hash, open the .htpasswd file, for example using the nano editor, and paste it into the user line, immediately after the colon (:).
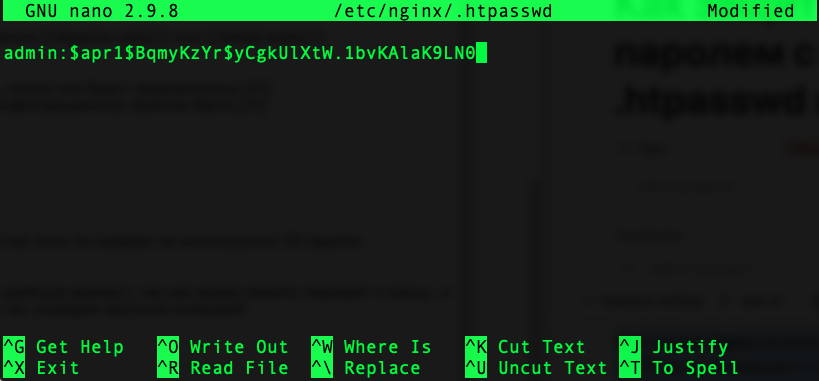
Save the changes by pressing Ctrl + O and exit by pressing Ctrl + X.
Configuring Nginx to protect a website folder
First you need to find the nginx configuration file that contains your website's server block. It can be either a separate file or part of another file. In most cases the grep utility can help you. It'll find occurrences of the search phrase in files in the specified directory recursively:grep -rn "eurohoster.site" /etc/nginx- -r - recursive search of all contained files and directories;
- -n - display the line number of the first occurrence of the search phrase;
- eurohoster.site - your domain;
- /etc/nginx - directory to search in.

Open the configuration file you found, for example using nano. Make sure that the file contains a server block with your domain.
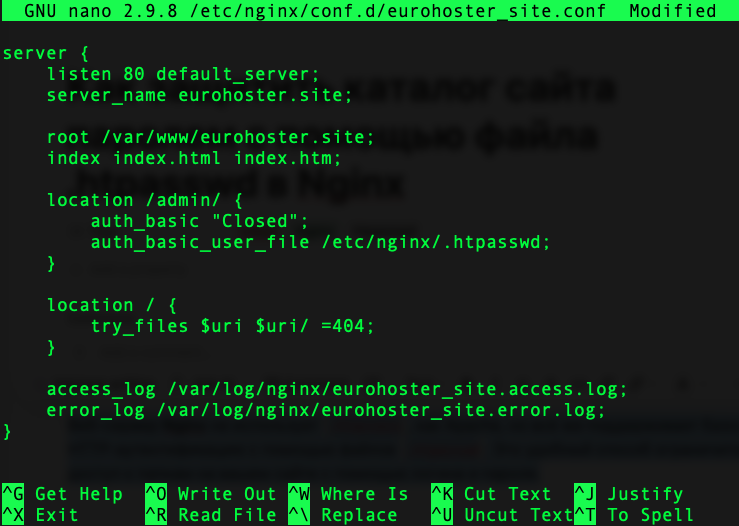
nano /etc/nginx/conf.d/eurohoster_site.conf- /etc/nginx/conf.d/eurohoster_site.conf - path to the nginx configuration file for your domain.

To protect a specific directory on the site with a password, we need to add just one location block before the main location (location /):
location /admin/ {

    auth_basic "Closed";

    auth_basic_user_file /etc/nginx/.htpasswd;

}
- /admin/ - URL with restricted access. In the example - http://eurohoster.site/admin/;
- auth_basic "Closed" - includes user and password verification using the HTTP Basic Authentication protocol. Displays the specified message in the form;
- /etc/nginx/.htpasswd - path to the .htpasswd file.
Save the file by pressing Ctrl + O and exit with Ctrl + X (if using the nano editor).
Check the nginx configuration for validity:
nginx -tIf the response is test is successful, restart the web server:systemctl restart nginx
As a result, you will see the coveted authorization window in your browser:
We have thoroughly discussed the process of protecting a website directory (section) with a password using the .htpasswd file when using the Nginx web server. If you encounter any problems with this issue on our VPS and dedicated servers, you can always contact technical support via chat on the website or by creating a ticket.