How to add an additional IP address to a server
26 May 2025, 21:36:22
After ordering an additional IP address for your VPS or dedicated server from EuroHoster, the new IP address is automatically issued and added to the network configuration on the server without any intervention on your part. Except in cases where you have restricted access to the server and we are physically unable to access it. In this case, you can always contact our technical support to add a new IP address by providing access to the server. But if you want to add the IP yourself, these instructions are for you!Now we will look at a few simple commands for adding an additional static IP address on servers running Ubuntu, Debian, AlmaLinux, CentOS, and other systems based on them. All commands are executed as the root user.
Temporary addition of an IP address
Sometimes it can be useful to temporarily raise the IP address with just one command. The ip utility is part of the iproute2 package, which is present in most modern Linux distributions, allowing us to raise the IP address on almost any system to the first reboot with just one simple command.First, let's find out which interface is being used with the command from the same utility:
ip aIn the example shown, there are only two interfaces, one of which is local (lo), which means we use the second one (ens18):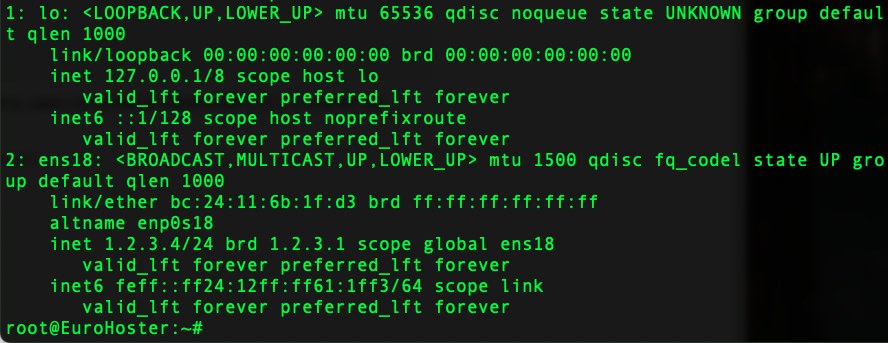
Don't be scared if you see a different picture with way more interfaces or ones with different names. A dedicated server can have multiple network cards and run various VPN services and Docker. That is why we used the ip a command to view not only all network interfaces, but also information about them.
Your interface is the one that uses the main server IP address (specified in the inet line, in the example 1.2.3.4):

Add a new IP address using the command:
ip addr add 1.2.3.5/24 dev ens18- 1.2.3.5/24 - нnew IP address and subnet mask;
- ens18 - the network interface used. In your case, it may be different. (eth0, eth1, ens33, enp0s3 и др).
ip a show ens18- ens18 - network interface.
The IP address will remain in the network configuration until the server/network interface is restarted, but it is useful to know how to delete it manually. A simple command will help with this task:
ip addr del 1.2.3.5/24 dev ens18- 1.2.3.5/24 - removable IP and subnet mask;
- ens18 - network interface.
Adding an additional IP address on Ubuntu 18.04 and below, Debian 9 - 12 without Netplan
Open the network interface configuration file:nano /etc/network/interfacesWe see a similar configuration: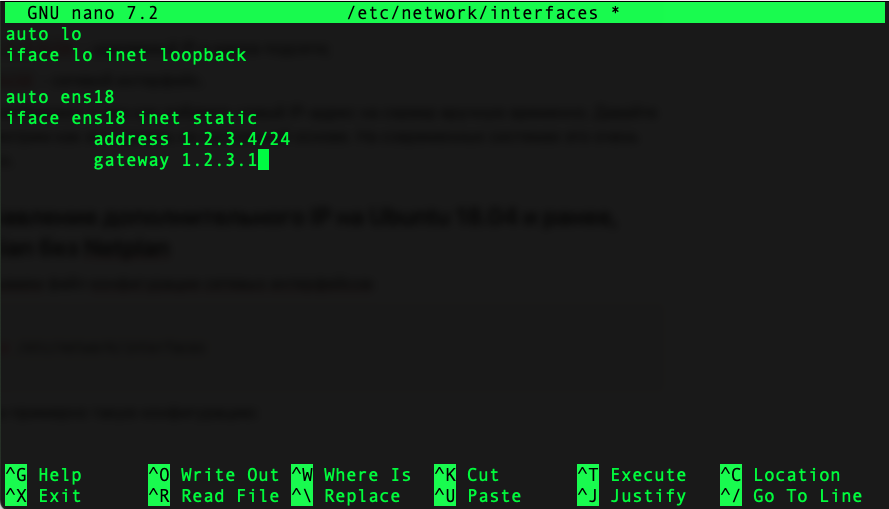
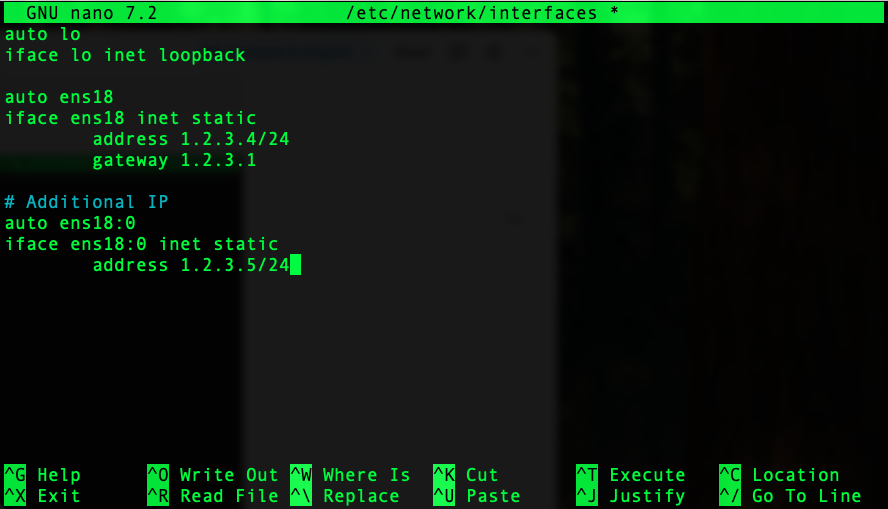
In your case, the basic configuration may differ significantly, especially on a dedicated server. However, to add an additional IP, simply add the following three lines to the end of the file:
auto ens18:0

iface ens18:0 inet static

address 1.2.3.5/24
- auto ens18:0 - automatic interface startup ens18:0 (virtual interface linked to the interface ens18, in your case, it may be different) when the system is booting;
- iface ens18:0 inet static - declare the ens18:0 interface (in your case it may be different) with a static IP configuration;
- address 1.2.3.5/24 - your new IP address with subnet mask.
Save the changes to the file using the key combination Ctrl + O and exit the editor using Ctrl + X.
In order for the changes to take effect, you must restart the service. networking.service:
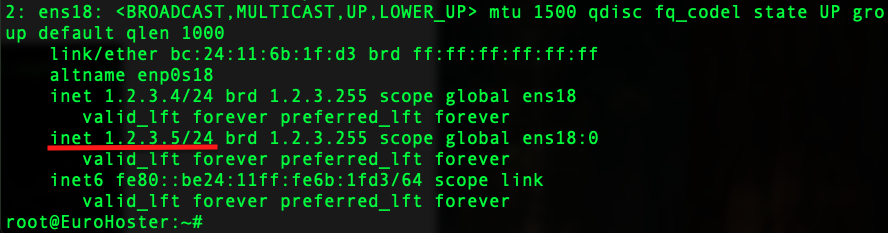
systemctl restart networkingYou can view the result using the command we already know:ip a show ens18- ens18 - network interface.
Unlike the example where we added the IP address using the ip utility, the current configuration will work even after the system is rebooted.
Adding an additional IP address on Ubuntu 18.04 and above, Debian 9 - 12 with Netplan
Open the Netplan configuration file (the name of the configuration file may vary):nano /etc/netplan/50-cloud-init.yamlWe get similar file contents: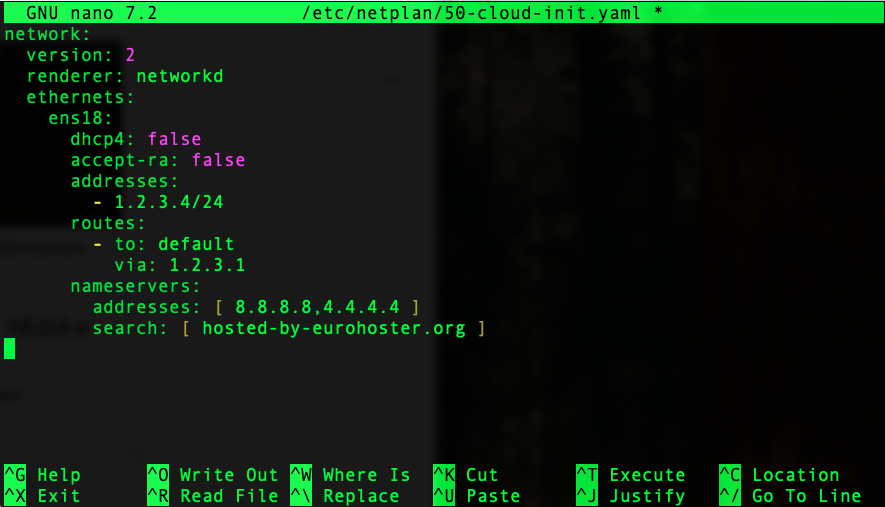
To add an additional IP address, simply enter it in the addresses block on the line following the main IP address, using the same format. Please note that this configuration file is sensitive to formatting. All indents must be spaces.
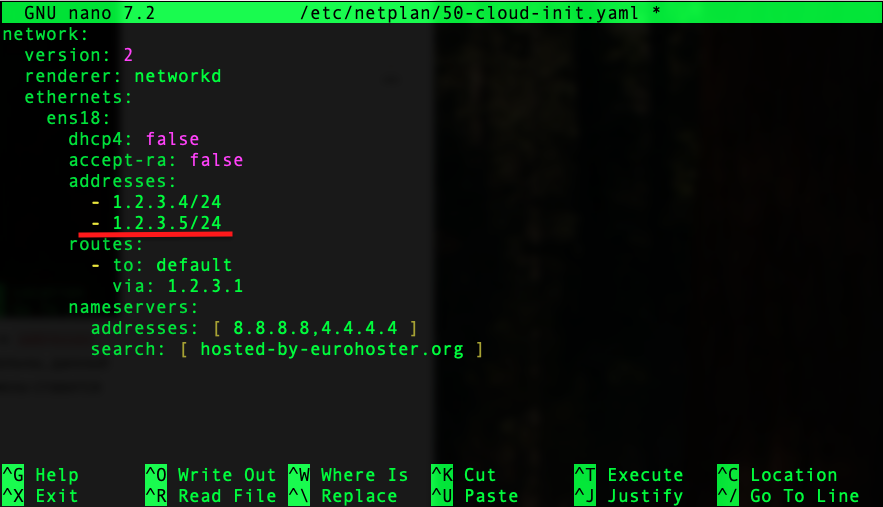
Press Ctrl + O to save the changes and exit using Ctrl + X.
To test the configuration and its application, enter the command:
netplan tryIf there were no errors in the configuration, a 120-second timer will appear, during which you must press the Enter key to accept the new configuration.
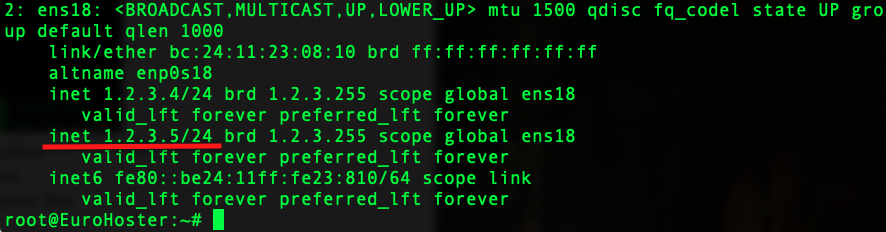
The ip utility will show us the IP addresses on the selected interface:
ip a show ens18- ens18 - network interface.
Adding an additional IP on AlmaLinux 8 / 9, CentOS 7 / 8 / Stream, Rocky Linux 8 / 9, RHEL 7
In the operating systems mentioned, network interfaces are managed by the NetworkManager program. Using its terminal utility nmcli, we can manage interfaces, including adding IP addresses.To add an additional IP address, we need to know the name of the main interface where the IP will be added. The easiest way is to use the command:
ip aAnd select the interface on which the main IP address of the server is already raised (specified in the line inet). In the example, this is the ens18 interface with IP 1.2.3.4, but you may have a different one: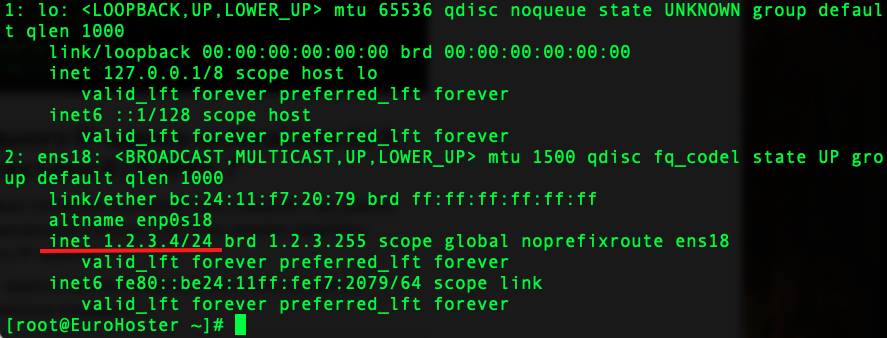
Command to add an additional IP address:
nmcli connection modify ens18 +ipv4.addresses 1.2.3.5/24- ens18 - network interface used;
- + - indicates the addition of a configuration;
- ipv4.addresses - indicates the addition of an IPv4 address;
- 1.2.3.5/24 - IP address and subnet mask.
nmcli connection down ens18 && nmcli connection up ens18- ens18 - network interface used (you may have a different one).
ip a show ens18- ens18 - network interface.
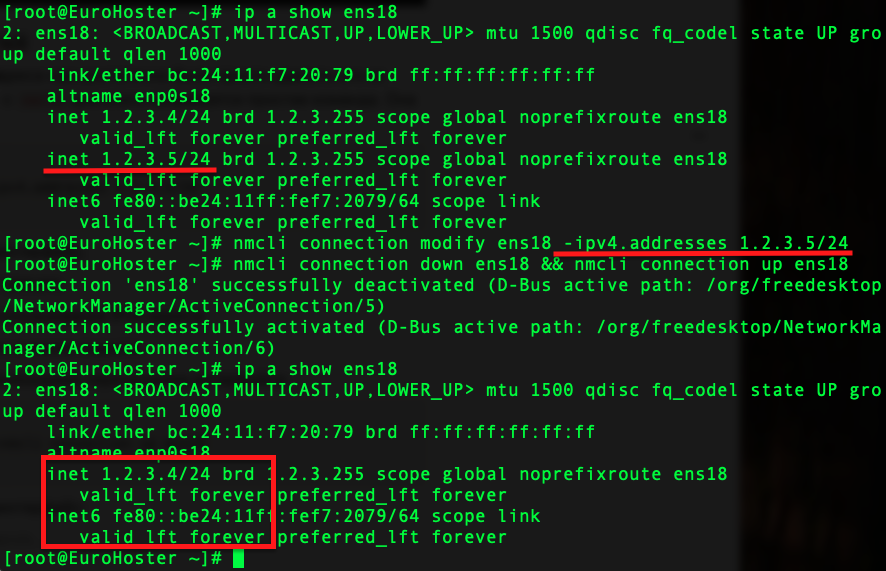
Removing an IP address using nmcli
In other systems, to remove an IP address, simply delete it from the configuration file. That is, simply roll back the changes you made. In the case of nmcli, the command is used to delete an IP address. It is almost identical with the addition of IP:nmcli connection modify ens18 -ipv4.addresses 1.2.3.5/24- ens18 - network interface used;
- - - indicates deletion of configuration;
- ipv4.addresses - indicates the use of an IPv4 address;
- 1.2.3.5/24 - removable IP address and subnet mask.
nmcli connection down ens18 && nmcli connection up ens18- ens18 - network interface used;
We have looked at specific examples of adding an additional IP address to a server when using different modern Linux distributions. If you encounter any problems with this task, you can always contact technical support.