Manage iptables rules: view, delete, and create.
25 Apr 2025, 00:10:01
In this article, we will look at the basic commands for managing the server firewall. Specifically, the iptables utility, which allows you to control inbound, outbound, and forward traffic based on defined rules. It communicates directly with the Netfilter kernel subsystem, which provides high performance.All the following commands are executed on the VPS under the root user. Be careful, the iptables utility can completely restrict access to the server, including for you.
How to view current iptables rules
Let's start with the simplest one - viewing the rules set up using the command:iptables -nL --line-numbers- -n - disables IP to domain conversion;
- -L - outputs a list of all default rules, but you can specify a specific chain of rules;
- --line-numbers - displays line numbers.
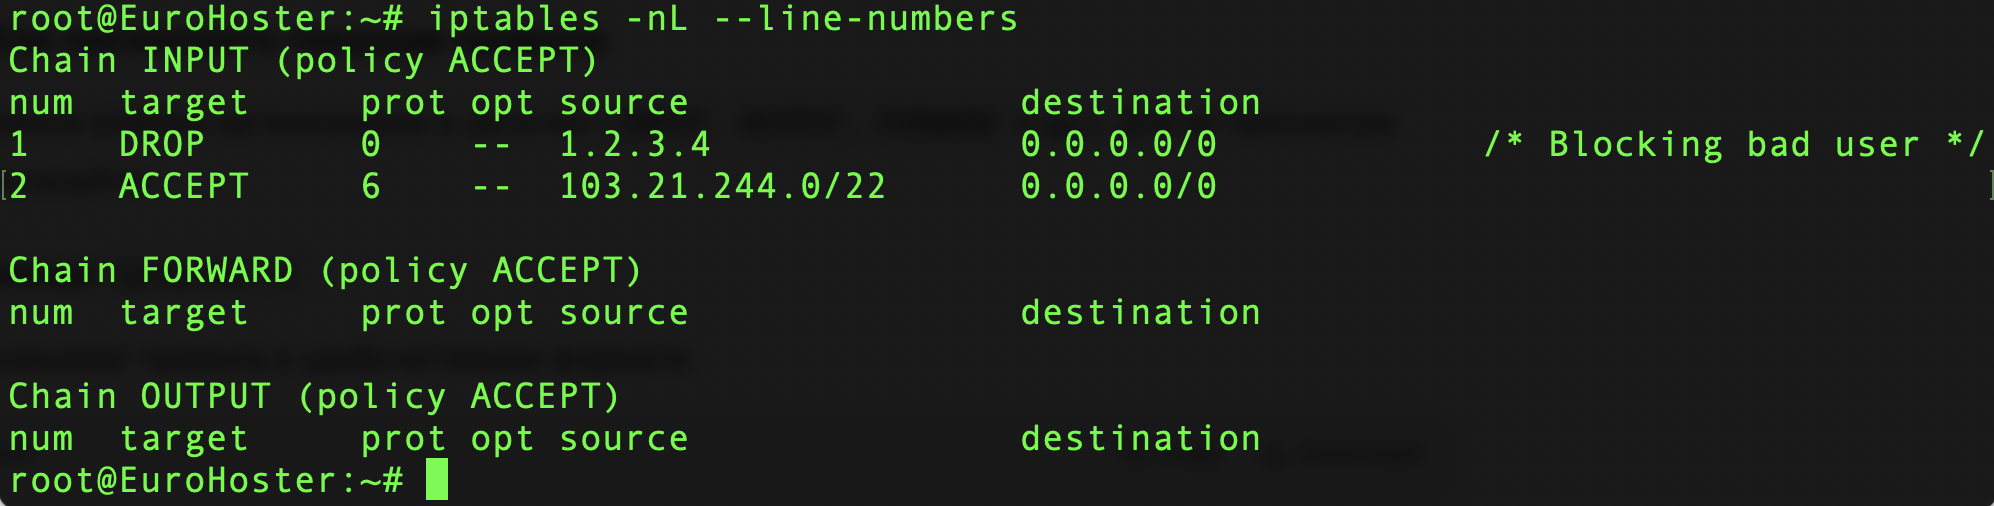
Let's take a close look at him.
We see a structure of three chains: INPUT, FORWARD, OUTPUT. These are the main chains that we will consider in this article, but there are others. Moreover, you can create new chains on your own, but this topic is beyond the scope of our article.
Next to the chain name we can see its policy. This can also be changed.
We can see the rules we are going to control in the block of each chain. In our example, the FORWARD and OUTPUT chains are empty, while INPUT contains two rules.
Let's break down the columns of this table:
| Column | Description |
|---|---|
| num | The number of the line (rule) in the chain. Convenient for deleting or inserting. |
| target | Action - what to do with a package if it satisfies this rule. Examples: ACCEPT, DROP, REJECT, LOG, custom chain name. |
| prot | Protocol in numerical designation: tcp(6), udp(17), icmp(1), or all(0, any). |
| opt | Options related to filtering. There's usually -- unless there's something special going on here. Sometimes !, + or other options appear if additional modules are used. |
| source | Source - the IP address or range of the source. In the example 1.2.3.4 or 103.21.244.0/22. |
| destination | Destination - the destination IP address. 0.0.0.0/0 means "all addresses". |
| Commentary | Outputs comments to rules, if they are added using the module comment (in the example: /* Blocking bad user */). |
How to add a rule to iptables
In order to deny access to the server from a certain IP address or, conversely, to deny connection from the server to a certain address, we add a rule to the corresponding iptables chain. For example, let's deny connection to our server for a user with IP address 1.2.3.4. The command will look like this:iptables -I INPUT -s 1.2.3.4 -j DROP- -I - adds the rule to the beginning of the chain [chain_name];
- -s - source IP address or range;
- -j - action to be taken with the package (ACCEPT, DROP, REJECT or other).
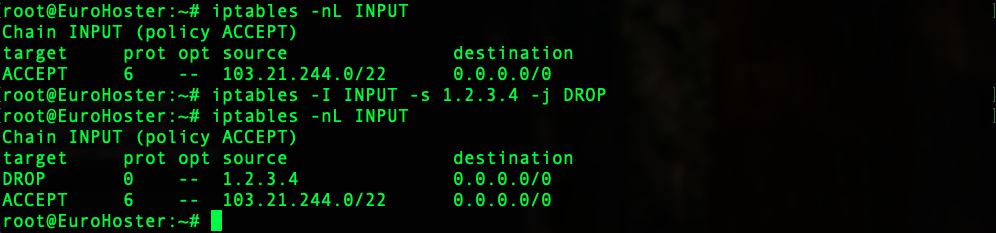
We can see that our rule has been successfully added to the beginning of the INPUT chain. You may also have noticed that we didn't specify the protocol explicitly in our rule and the prot column shows 0, which means that our blocking will be valid for any protocol. It is important to remember that iptables "enforces" rules from top to bottom.
How to remove a rule from an iptables chain
To delete a rule we need to know its number. Since earlier we have output all rules with line numbers displayed, we already know the rule number and can use the command:iptables -D [chain_name] [rule number]For example, let's remove rule number 2 from the chain INPUT:iptables -D INPUT 2Result: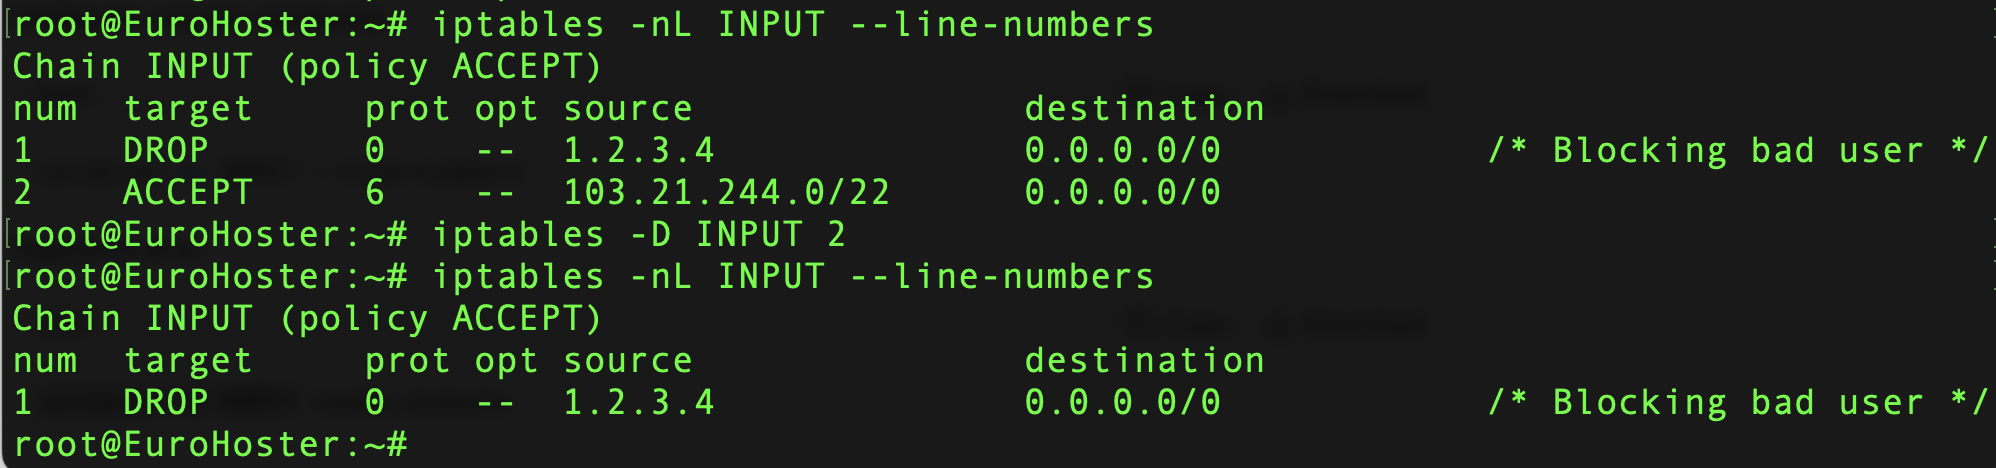
This is the easiest way to remove a rule from iptables, but there is another way.
We can remove a rule by specifying the rule itself instead of the number. For our example, the command would be as follows:
iptables -D INPUT -s 103.21.244.0/22 -p tcp -j ACCEPTWe end up with the same result: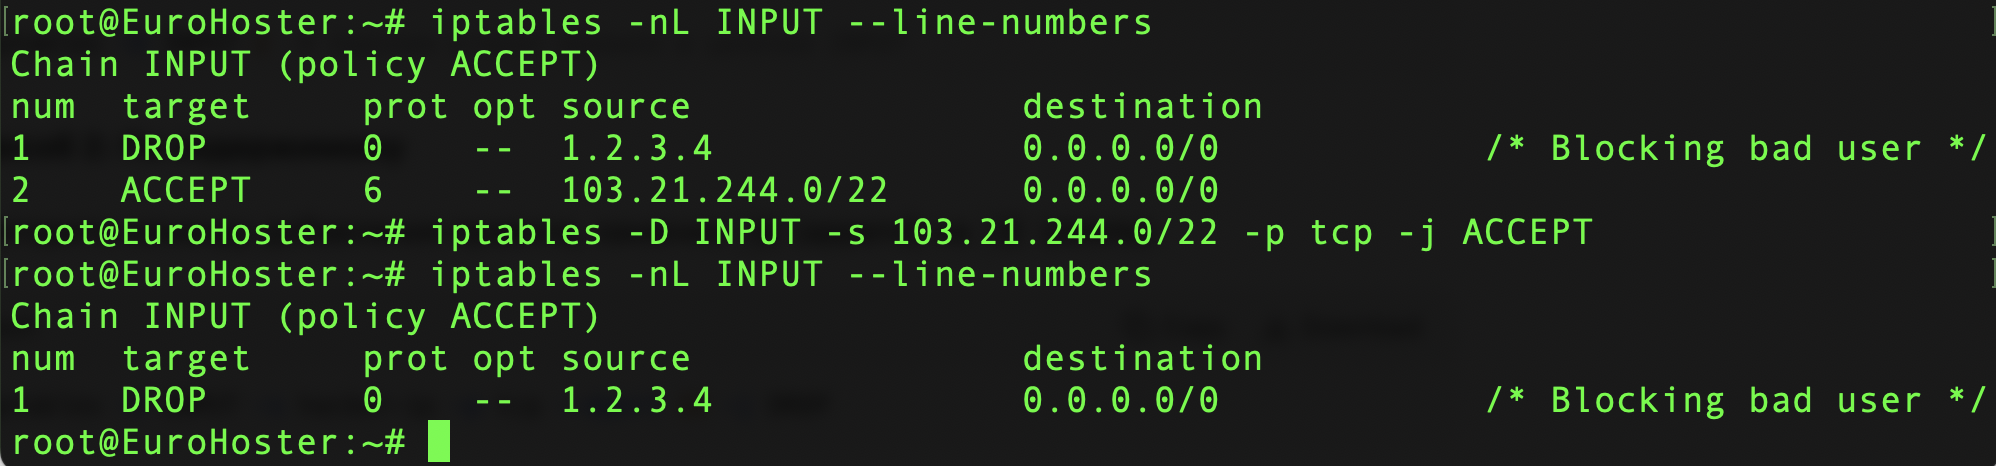
How to clear the entire iptables chain
To remove all rules from the chain at once, you can use the command:iptables -F [chain_name]Let's try:iptables -F INPUTLet's get a result: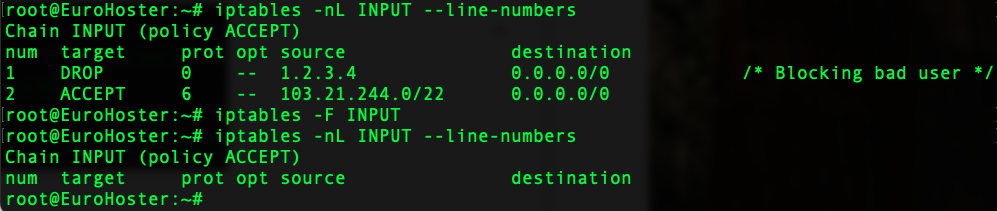
Be careful, because not specifying a chain after the -F switch will remove all rules from all iptables chains:
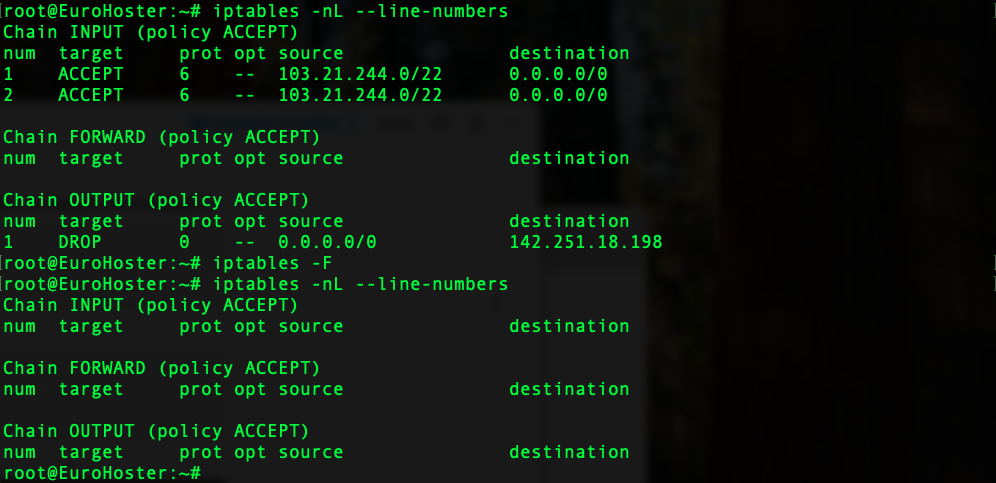
Clearing all the rules in a chain can play tricks on you if you haven't considered the default policy for the selected chain.
How to change the default policy for chaining in iptables
The default policy is the action that will be taken on all packets that match the chain but are not subject to any rule in the chain. To change the default policy for an iptables chain, use the command:iptables -P [chain_name] [policy]In the example, change the policy to DROP on the FORWARD chain with the command:iptables -P FORWARD DROPLet's get it:
Possible default policies:
| Politics | Which is doing |
|---|---|
| ACCEPT | The package is allowed (skipped) |
| DROP | The package is dropped (silently) |
| REJECT | Package rejected (with notification) |
Saving and restoring iptables rules
Once we have made all the necessary changes to our firewall settings, let's save them to a file using the command:iptables-save > ~/iptables_backup.txtThis command will save all iptables rules to the iptables_backup.txt file in the user's home directory: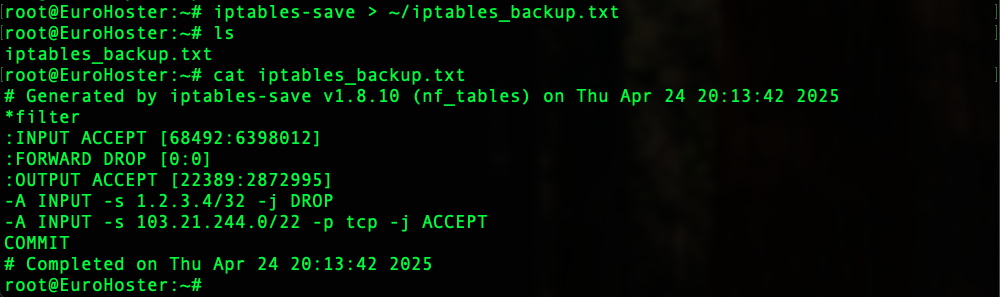
To import the rules from the iptables_backup.txt file into iptables we will use a simple command:
iptables-restore < ~/iptables_backup.txtThe result is: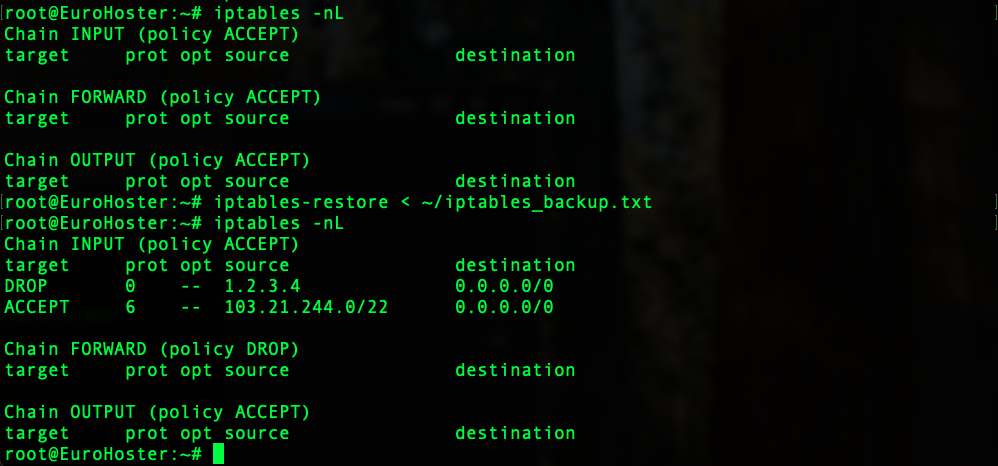
We can see that the initially empty iptables was filled with rules from our iptables_backup.txt file. Be careful, because this command will overwrite the existing iptables rules and also change the default policies.
We have covered the basic keys in working with iptables. Be careful and extremely careful when working with a firewall on a server. Make a copy of the current settings with iptables-save and check the default policy of the chain you are working with. In case of failure, remember - there are no unsolvable problems. You can always contact technical support.