How to restrict a user in Shell (SSH terminal) to a specific directory
12 Aug 2024, 16:32:14
Since security is very important in today's digital world, restricting access to our server via SFTP helps minimize risks.If you don't configure a linux server with SSH (secure shell) access the right way, any user with an account on that system can log in and possibly cause damage to your server.
What you can do is restrict these users to chroot jail. By doing so you strictly limit the users access to your system, to certain files. Now any user or ssh group user that is restricted by chroot jail has:
- Access to the server via sftp only
- Access to a specific directory only
A chroot operation (short for change root) is a Unix operation that changes the visible root directory to the one specified by the user. This is a great security addition for your Linux servers, which is especially important if you have sensitive data stored on your server and you don't want users to even view those files and folders.
Any process running after the chroot operation only has access to the new root directory and its subdirectories. This operation is colloquially referred to as chroot jail because these processes cannot read or write outside of the new root directory.
What chroot jail is used for
Chroot jail is used to create a limited “sandbox” for a process. This means that the process cannot maliciously modify data outside of the established directory tree.
Another use of chroot jail is to replace virtual machines. This method is called kernel-level virtualization and requires fewer resources than virtual machines. This operation allows users to create multiple isolated instances on a single system.
Step 1: Create an SSH chroot jail
- First, you need to create a chroot jail using the mkdir command below:
mkdir -p /home/testmkdir - needed to form a directory
- Then define the necessary files. According to the sshd_config man page, the ChrootDirectory option specifies the path to the directory where chroot will be performed after authentication. The directory must contain the necessary files and directories to support the user session. The interactive session must have at least one shell, usually sh, and the base /dev nodes such as null, zero, stdin, stdout, stderr, and tty devices:
ls -l /dev/{null,zero,stdin,stdout,stderr,random,tty}
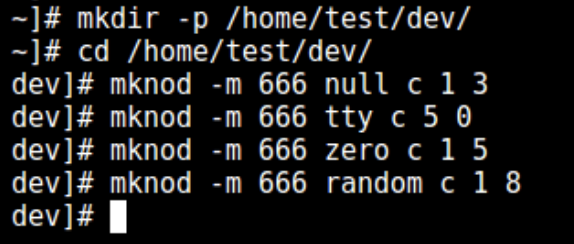
- Now create the /dev files as follows using the mknod command.
mkdir -p /home/test/dev/

        cd /home/test/dev/

mknod -m 666 null c 1 3

mknod -m 666 tty c 5 0

mknod -m 666 zero c 1 5

mknod -m 666 random c 1 8
If you want to translate user and group IDs into readable strings, you will need to configure NSS by copying the following files into your chroot environment:
- /etc/nsswitch.conf
- libnss_systemd.so
- libnss_files.so
- libcrypt.so
- Then set the appropriate ssh user rights on the chroot jail. Note that chroot- and its subdirectories and subfiles must be owned by the root user and must not be writable by any ordinary user or group:
chown root:root /home/test

        chmod 0755 /home/test

        ls -ld /home/test
Step 2: Set up an interactive shell for SSH Chroot Jail
- Now type the following command to create the bin directory:
mkdir -p /home/test/bin- Then copy /bin/bash to the /bin/ directory using the cp command:
cp -v /bin/bash /home/test/bin/- Before moving to a new directory, you must enable the bash command. To do this, copy the command file and all associated libraries to the new root directory.
Next, select the bash files needed for the shared libraries according to the example above and copy them to the libdirectory:
ldd /bin/bash

        mkdir -p /home/test/lib64

        cp -v /lib64/{libtinfo.so.5,libdl.so.2,libc.so.6,ld-linux-x86-64.so.2} /home/test/lib64/
Step 3: Create and configure an SSH user
Create a user using the useradd command that will log in to the chroot environment and set a strong password for it:useradd username
passwd usernameCreate a common chroot jail configuration directory, /home/test/etc, and copy the updated account files (/etc/passwd and /etc/group) into it as follows:
mkdir /home/test/etc

cp -vf /etc/{passwd,group} /home/test/etc
Important to remember: if you add new SSH users to the system, you will need to copy the updated account files to the /home/test/etc directory.
Step 4: Configure SSH to use Chroot Jail
- Open the sshd config file
nano /etc/ssh/sshd_configand make/replace the following below lines in the file:
define username to apply chroot jail to
Match User username
specify chroot jail
ChrootDirectory /home/test
- Save the file, close it, and restart SSHD services:
systemctl restart sshdAs the service starts, the OpenSSH server (sshd) reads the configuration file.
Step 5: SSH verification with Chroot Jail
Now test with SSH and see if the user is restricted from running external commands like ls, date, uname and others:ssh [email protected]The user only has access to bash and its commands pwd, history, echo, etc.
Step 6: Create the SSH user's home directory and add Linux commands
In the previous step we can make sure the user is locked in the root directory, then we can create a home directory for the SSH user this way (do this for all future users):mkdir -p /home/test/home/username
chown -R username: username /home/test/home/username
chmod -R 0700 /home/test/home/usernameAfterwards, add a few custom commands such as ls, date , and mkdir to the bin directory:
cp -v /bin/ls /home/test/bin/

cp -v /bin/date /home/test/bin/

cp -v /bin/mkdir /home/test/bin/
Then check the shared libraries for the above commands and move them to the chrooted jail libraries directory:
ldd /bin/ls

cp -v /lib64/{libselinux.so.1,libcap.so.2,libacl.so.1,libc.so.6,libpcre.so.1,libdl.so.2,ld-linux-x86-64.so.2,libattr.so.1,libpthread.so.0} /home/test/lib64/
Step 7: Check SFTP with Chroot Jail
Run a final test using sftp and verify that the commands you just installed work.Enter the line below in the /etc/ssh/sshd_config file:
Enable sftp to chrooted jail
ForceCommand internal-sftp
Save the file and exit.
Afterwards, restart the SSHD services:
systemctl restart sshdNow test with SSH and you will get the following result:
ssh [email protected]Try applying SFTP as indicated below:
sftp [email protected]