How to configure UFW in Ubuntu and Debian
26 Jun 2026, 16:56:05
UFW is a utility for managing the Linux firewall. It was originally developed for Ubuntu, but is also available in many other distributions. The utility is essentially a frontend for iptables and was created to simplify interaction with the firewall using human-readable syntax. UFW comes pre-installed in actual versions of Ubuntu and can be installed on other Debian-based distributions from the system repositories. On virtual servers running Ubuntu Server, UFW is also installed out of the box. In this article, we’ll walk about the initial setup and basic syntax of this popular utility, as well as configure the firewall on a new VPS running Ubuntu Server 24.04.Install UFW
On Ubuntu and Ubuntu Server, the utility is installed by default. You can verify this using the UFW status command:ufw status
This command output indicates that UFW is installed but not enabled.
If you see a message stating that the program is not installed, you can install it on Debian and Ubuntu using the following commands:
apt update

apt install ufw
After installation, the firewall will also be turned off, but don't turn it on. We'll configure the basic settings.Default Policy
Let's start by defining the default policies for incoming and outgoing traffic on the server. We'll implement a basic security scheme:- All incoming connections are prohibited (except those permitted by the rules);
- All outgoing connections are allowed.
Block all incoming connections to the server:
ufw default deny incomingAllow all outgoing connections:ufw default allow outgoingIn this example, we execute these commands after connecting to the VPS via SSH. Our connection did not get disconnected because UFW is set to inactive. We deliberately left it disabled from the start so that we could add all the necessary rules without any concerns.
Add Rules
Now we've blocked external access to all of the server's ports, we'll start opening them only for the services we need. One of the most important ones is SSH.Open SSH access to the server
The command for the base case:ufw allow sshIf it was added without any errors, you will receive a message confirming that the rule list has been successfully updated:
However, one of the most common security best practices for servers is to change the SSH port. Therefore, the default case does not always apply. If the SSH port on your server is different from the default, you must specify it explicitly:
ufw allow 2245/tcp- 2245 - Server SSH port;
- tcp - protocol (unless specified, the port will be open for both TCP and UDP).
ufw allow from 192.168.1.0/24 to any port 2245 proto tcp- 192.168.1.0/24 - the IP address or subnet from which to allow connections;
- 2245 - SSH port;
- tcp - protocol.
Open HTTP/HTTPS access
If you plan to use a web server, you must open the standard HTTP/HTTPS ports (80 and 443):ufw allow 80/tcp
ufw allow 443/tcpView the UFW Rules
To view the rules we added earlier without starting UFW, use the following command:ufw show addedThis way, we can verify the logic behind our rules, since after starting UFW, we might accidentally restrict access even for our current session.
When UFW is active, you can view the current rules using the following command:
ufw statusandufw status numberedThe latter displays a numbered list of rules. This is useful for working with them more easily later on.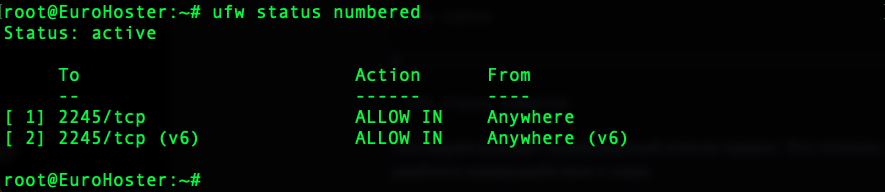
Delete Rules
To remove a UFW rule, use the following command:ufw delete [RULE_FOR_DELETING]- [RULE_FOR_DELETING] - the full rule that needs to be deleted.
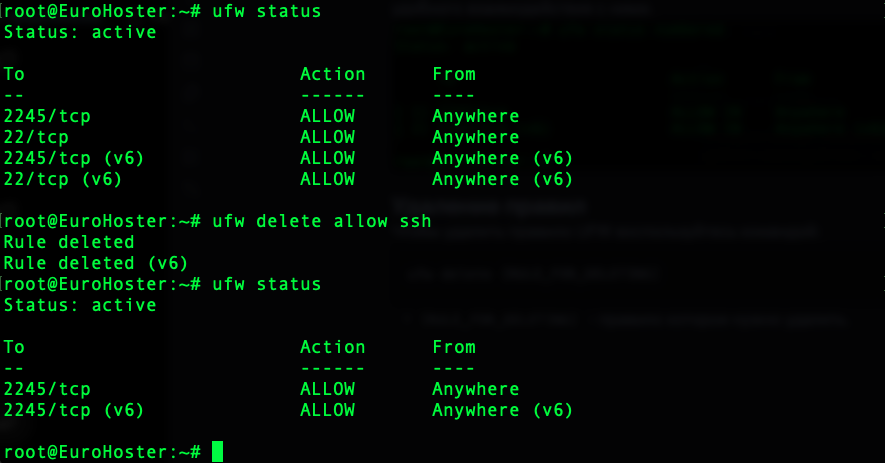
It's easier to display a numbered list of rules and delete them by number:
ufw delete [NUMBER_OF_RULE]- [NUMBER_OF_RULE] - rule number from the list.

Enable UFW
To ensure that all the rules added earlier finally take effect, you must enable the firewall using the following command:ufw enablePress y to confirm the start.
Disable UFW
To disable the firewall, use the following command:ufw disableUFW will be turned off, but all the rules within it will be preserved and will take effect again once it is turned back on.IPv6 Support
UFW supports both IPv4 and IPv6. In most actual versions of Ubuntu and Debian, IPv6 support is enabled by default in UFW. This is evident when updating the rules and is also specified in the UFW configuration file:grep "IPV6" /etc/default/ufwIf IPv6 support is enabled, you will see:
If not, you can enable it by changing the specified setting (IPv6) in the configuration file:
nano /etc/default/ufw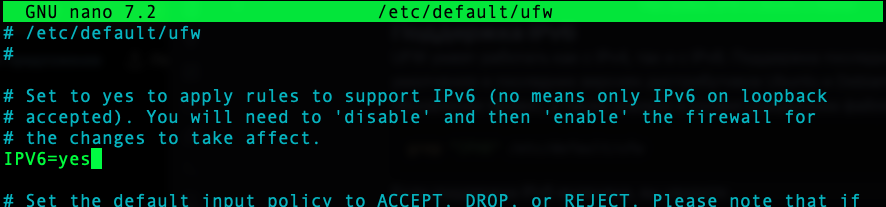
Save your changes using the Ctrl+O shortcut, and exit using Ctrl+X.
To apply the changes, you must restart UFW using the following command:
ufw disable && ufw enablePress y to confirm the operation.
Logging UFW
UFW can maintain an event log in which it records information about blocked connections, limit triggers, allowed connections, etc., depending on the logging level.Enable logging
To enable logging, use the following command:ufw logging on
Logging Level
UFW has 4 logging levels: low, medium, high, and full. The levels are graded by the amount of information output, ranging from low to full, respectively. The low level is sufficient for obtaining information about when blocking rules are triggered.To set a specific level, use the following command:
ufw logging medium- medium - logging level.

Disable logging UFW
To disable the event log, use the following command:ufw logging off
Viewing UFW Logs
The UFW event log is stored by default in the file /var/log/ufw.log. You can view the last 100 lines of the file using the following command:tail -100 /var/log/ufw.logReset UFW
To completely reset all firewall rules and policies, use the following command:ufw resetThis command will disable UFW, delete all rules and settings, and restore the default policies.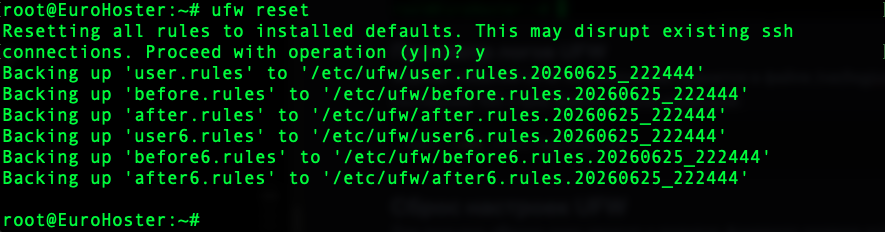
Conclusion
Many experienced administrators prefer to work directly with iptables, but UFW remains popular due to its ease of configuration. For casual users, it’s an intuitive and simple tool for implementing basic security for their servers.Just a few simple commands will help filter out unwanted traffic and protect your SSH, FTP, or even your database management system, significantly reducing the risk of unauthorized access.